Playthroughs/Yeoman Johnson05
The Adventures of Yeoman Johnson, Episode 5: The Berserker by OrigamiGuy
Welcome to Tier 2, stout Yeoman. The Berserker is the first of the classes we'll tackle in that second row.
In my opinion, the Tier 2 classes are the toughest to get by. If you're playing (as I am, for this series of playthroughs) all the Tier 2 classes before any of the Tier 3's, then you're stuck with tougher enemies all around with none of the bonus glyphs you get in Tier 3. There's a LOT of benefit to having those extra glyphs to play with, and I'll be enjoying none of that here.
On the plus side, Tier 2 has much more dramatic class bonuses (boni? bonae?) than Tier 1 has. We're getting out of the realm of cheesing the gods for killing power and into the area of true awesomeness.
The Berserker is just such a character. Extra power when
Contents
Race Selection
As with most of the fighter classes, I'm sticking with Human. That attack bonus that grows over time is just too good to ignore, and the Berserker's special attack bonuses will play into that nicely.
Beginning Exploration
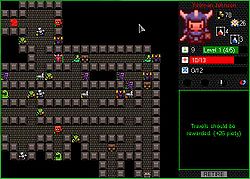
It took many (many) false starts to get a decent map going. Once I finally get a decent array of monsters to begin with, it turns out to be a doozy. The Pactmaker's altar is here, so I explore out as far as I can go (which turns out to be a lot) and begin worship with 26 piety.
I convert three glyphs (BURNDAYRAZ, ENDISWAL, and WEYTWUT; useless here anyway) and keep a fourth I've found, GETINDARE. A lv2 Wraith goes down in straight hits (thank you, Mageslay bonus!) and now I'm ready to grind.
A lv1 Warlock brings me to clvl 2, I get 20 more piety and use it to buy the Learning boon, and off we go!
The Grind Begins
Lv3 Warlock, down in two swings. I've got enough health left over to make one hit on a lv6 Wraith, then I kill off two lv1's to level up and refill. Two more hits finishes off the Wraith, and I end up at clvl4 after it's all said and done.
A lv7 Wraith dies in straight hits. At least that's what I think, until I realize (two hits in) that my plan involved using GETINDARE to get first strike on the last hit. In my haste, I forgot that Wraiths give mana burn. I decide to quaff two mana potions to get enough mana for the glyph, then finish it on the third hit. Clvl 5.
For the next one I take one swing at a lv8 Goat, cast GETINDARE, and swing again for the KO, which makes me clvl 6 if only just barely.
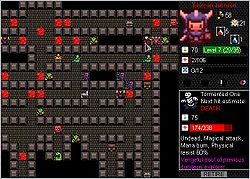
Exploring behind the Goat gets me the IMAWAL glyph (useless, instantly converted) and reveals the boss (finally). It's the Tormented One, a souped-up Wraith that gives Mana Burn and has 60% physical resist. That negates my attack bonus and then some.
Oh well; I'll deal with that later. At least I'll resist his attack as well. His little brother, a lv9 Wraith, waits just up the corridor. I've got 93 health after buying the appropriate boon from TP. The Wraith's attack is 63, which with my resist (half, rounded down) gives him 31 damage per whack. His HP is down to a sliver in two hits, so I have enough leeway to explore one square of corridor and regain enough HP to survive the last hit. Two more lowbies bring me to 29/30 XP.
I pop down to the shop for a health potion, then kill a lv5 Zombie for the level-up to 7. More lowbies raise my XP to 29/35.
Tormenting the Tormented
It's a pretty standard battle from here on out. Some of the lowbies I killed have first strike, so I get two hits off (just BARELY) on the boss before I've got to heal up. He's got 174 HP left.
Three more lowbies level me up and give me full HP. I'm able to survive three swings this time, leaving me with 8 HP and the boss within two hits of being dead. Or un-undead. Or whatever.
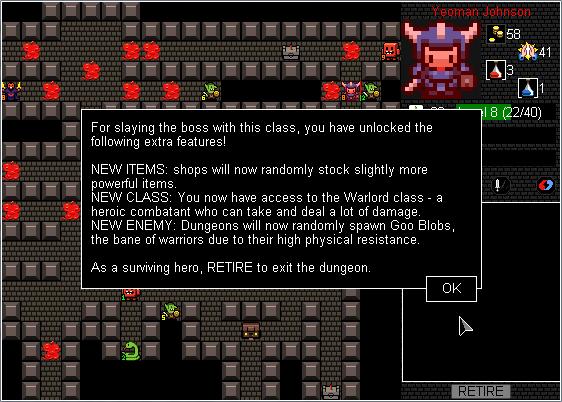
At this point, I've got enough potions to seal the deal. Quaff, hit, quaff, victory. I've now got access to more shop stuff, the Warlord class, and Goo Blobs will now spawn. Next episode: the Rogue!
Victory screenshot:
Ending Analysis
I won't lie to you: Getting the Mageslay bonus with a magic-using boss worked in my favor more than anything else that could have happened. I daresay that The Pactmaker wasn't even necessary by the end; I had enough leftover monsters to make clvl 10 and then some, so without Learning I could have at least made 8 with no troubles. The health bonus wasn't strictly necessary either, but it made everything go much faster.
Chatter
If you'd like a transcript of this episode, get out a pen and write down everything I've said. Other than that, comments and stuff are welcome.
Solid run, can't wait to see you get to Sorc, gave me sooo much trouble when I first played.


