Shifting Passages
Contents
Difficulty
Monster difficulty is 130%.
Shifting Passages
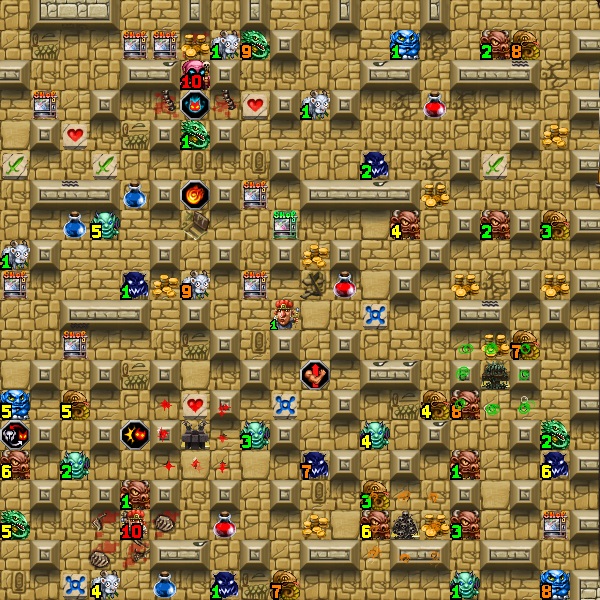
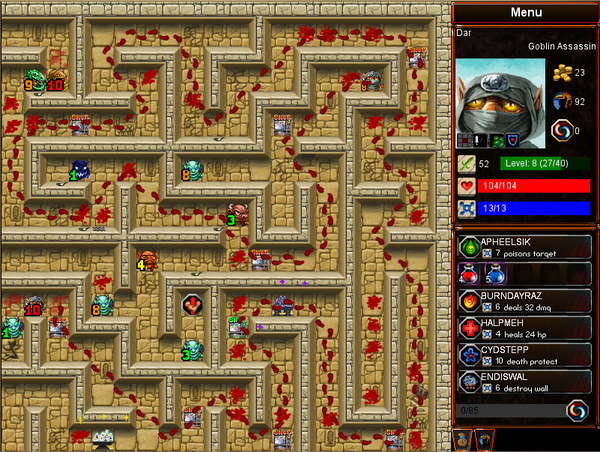
When you begin playing this dungeon, the Shifting Passages have a few walls but you generally have full freedom of movement. Every time you slay a monster, however, additional walls will appear, eventually forming a long and winding maze that can trap you. Once the maze is fully-formed, additional walls will not appear. Combined with the fact that the boss can teleport, this can easily leave you blocked.
Changelings
The Changeling enemy is unique to the Shifting Passages. They have a different special ability depending on your chosen class.
- Fighter - 1 death protection
- Warlord - 1 death protection per level (this is by far the most dangerous type of Changeling)
- Rogue - First Strike
- Assassin - Poisonous
- Monk - fast regeneration
- Paladin - 50% physical resist
- Wizard - magic attack
- Sorcerer - retaliates fireball
- Bloodmage - bloodless
The Changeling has no special abilities if you pick any of the other classes.
Evolvia
The boss of the Shifting Passages is Evolvia (there is also another random boss). Every time Evolvia is struck, their special abilities change randomly to one of the following:
- Counters Fireball
- Physical Resist 80%
- Death Gaze 100%
- Undead
- Poisonous
Evolvia always has first strike and blink.
There had been a phenomenon which you suddenly dies when you hit Evolvia with Reflex potion and not at full HP. This was because Evolvia changes its ability when being hit first, then death gaze kills you. This has been patched by devs as an exception.
Strategy
Like most of the maze levels, Shifting Passages will force you to find some way to avoid being trapped. Use of the ![]() IMAWAL glyph is highly discouraged as there is a virtually 100% chance this will block you off after all walls are formed. Unless you have the
IMAWAL glyph is highly discouraged as there is a virtually 100% chance this will block you off after all walls are formed. Unless you have the ![]() ENDISWAL glyph, you should convert IMAWAL on sight. Likewise, this means worshipping the
ENDISWAL glyph, you should convert IMAWAL on sight. Likewise, this means worshipping the ![]() The Earthmother is generally not a good idea. Finding the ENDISWAL glyph or using any form of knockback (the easiest thing to do is prep
The Earthmother is generally not a good idea. Finding the ENDISWAL glyph or using any form of knockback (the easiest thing to do is prep ![]() Binlor Ironshield or a
Binlor Ironshield or a ![]() Bear Mace) is highly advisable to make the dungeon more porous and easier to move around. Because Evolvia teleports, you will need to make many holes as possible in order to chase him. It's also possible to use
Bear Mace) is highly advisable to make the dungeon more porous and easier to move around. Because Evolvia teleports, you will need to make many holes as possible in order to chase him. It's also possible to use ![]() WEYTWUT to move monsters out of the way; if they are placed in a location where a wall will form, the wall will not form until they are killed.
WEYTWUT to move monsters out of the way; if they are placed in a location where a wall will form, the wall will not form until they are killed.
Because Evolvia teleports, has retaliate fireball in one of his forms, and has a reasonably high number of hit points a pure caster strategy is not recommended. Similarly, his death gaze and 80% physical resist form means that melee specialists still want to carry the BURNDAYRAZ glyph. Remember that Evolvia's abilities change whenever he's struck; if, say, you don't want to be poisoned, fireballing him will trade ![]() Poisonous for something else. Because BURNDAYRAZ will leave him
Poisonous for something else. Because BURNDAYRAZ will leave him ![]() burning you can hit another monster to "ping" him and reroll his abilities a second time if desired. If at all possible, try to kill the other boss before exploration is complete, allowing you to focus on Evolvia alone after you've completely explored the dungeon.
burning you can hit another monster to "ping" him and reroll his abilities a second time if desired. If at all possible, try to kill the other boss before exploration is complete, allowing you to focus on Evolvia alone after you've completely explored the dungeon.
Preventing Wall Formation
One trick on the Shifting Passages is that walls will not form if there is something blocking them from forming. This will also prevent other nearby walls from forming. Teleporting a monster into a position where a wall will form, or standing your own character in such a position whenever you make a killing blow, will alleviate the problems of wall formation. In order to do this, though, you must predict where the hallways will appear. "Nearby" is based on your character's position.
The simplest approach is simply to pick a tile with two walls next to it. These tiles are more likely than others to become walls in the future. If you take some more time, you can look for rows of nearby monsters, powerups, glyphs, and shops. Since the position of these things is never where a wall will form you can try to use that to identify future hallways, and the walls that will surround them. Another easy one is edge tiles; If you see gaps of 1-4 empty spaces in between walls against the edge of the dungeon it is very likely that they will become walls in the end. These are great places to put monsters with ![]() WEYTWUT. Ironically, if you build an artificial wall via IMAWAL on that tile, it prevents nearby wall forming just like when you've placed a monster or yourself on it. The more walls that form, the easier this becomes, so if you guess wrong it will become slightly easier to predict the wall placement the next time you make a kill.
WEYTWUT. Ironically, if you build an artificial wall via IMAWAL on that tile, it prevents nearby wall forming just like when you've placed a monster or yourself on it. The more walls that form, the easier this becomes, so if you guess wrong it will become slightly easier to predict the wall placement the next time you make a kill.
To make 100% sure, these tiles have 100% chance to become a wall.
- The rightmost column and the topmost row.
- A tile which is in odd-th rows from right and odd-th rows from the top. (Even-th rows from left and even-th rows from the bottom) This is very important because nearly all monsters will have this "safe" spot next to it. Unless you are being knocked back, you can kill nearly every monster without forming any walls with positioning yourself on the spot. Advanced players can even use
 IMAWAL without being stuck.
Be extra careful when you take wall breaking option. Knockback or specifically ENDISWAL approach is a good way to dig some holes around the hallways, but is may ruin your effort to prevent wall forming. If a tile was a wall but you broke it, this tile will NOT become a wall afterward; so positioning player or monster above the tile will not prevent wall forming. Also care about minotaur's knockback, wall will be formed after you are knocked back.
The simplest solution is to bring the ![]() Titan Guitar in. This will immediately break or erode all the walls, and no wall will further be formed.
Titan Guitar in. This will immediately break or erode all the walls, and no wall will further be formed.
Recommended Classes
Assassin
With the ability to kill weaker monsters with Swift Hands, the Assassin is well-equipped to navigate through the Shifting Passages and chase after the teleporting Evolvia. Using his poison, he can usually kill the first boss before exploration is complete which will allow him to focus his remaining efforts on Evolvia. Recommended races are ![]() Elf,
Elf, ![]() Goblin, or
Goblin, or ![]() Human.
Human.
Rogue
The Rogue will need to find a way to boost his hit points to survive attacks from Evolvia, but his massive damage output means that he can easily cleave through weaker monsters to chase after him. Being able to kill Evolvia with fewer blows means there's a lower chance of getting stuck or having to waste mana on a fireball to make him change to a more favourable form. You will benefit greatly from either Jehora Jeheyu or the Glowing Guardian in order to increase your hit points if you are not playing as a dwarf. Recommended races are ![]() Orc and
Orc and ![]() Dwarf.
Dwarf.
Warlord
Although changelings will have an absolutely devastating special effect, the Warlord's ![]() CYDSTEPP ability is largely unaffected by any of Evolvia's specials; only his 80% physical resist form is of any real consequence to a Warlord. When Evolvia does take his physical resistance form you can either use magic to hit him once, or use the
CYDSTEPP ability is largely unaffected by any of Evolvia's specials; only his 80% physical resist form is of any real consequence to a Warlord. When Evolvia does take his physical resistance form you can either use magic to hit him once, or use the ![]() Glowing Guardian to invoke
Glowing Guardian to invoke ![]() Cleansing. Like a Rogue, the high-damage Warlord can usually clean up Evolvia before he's had a chance to run around too much. The Warlord will need to find some way to break walls to move around Changelings, as he has effectively no way to kill higher-level ones. Recommended races are
Cleansing. Like a Rogue, the high-damage Warlord can usually clean up Evolvia before he's had a chance to run around too much. The Warlord will need to find some way to break walls to move around Changelings, as he has effectively no way to kill higher-level ones. Recommended races are ![]() Orc or
Orc or ![]() Gnome.
Gnome.
Bloodmage
With the ![]() BLUDTUPOWA glyph, the Bloodmage is well-equipped to kill the first boss with pure caster tactics and also bore some holes into the walls with ENDISWAL if he can find it. Once he's finished with the first boss, the Bloodmage can then start fighting as a primarily melee character and use his blood pools to support his fighting. Be careful not to get cut off from your blood pools. If using knockback or teleportation glyphs, be careful that walls do not form overtop of your blood pools. Recommended races are
BLUDTUPOWA glyph, the Bloodmage is well-equipped to kill the first boss with pure caster tactics and also bore some holes into the walls with ENDISWAL if he can find it. Once he's finished with the first boss, the Bloodmage can then start fighting as a primarily melee character and use his blood pools to support his fighting. Be careful not to get cut off from your blood pools. If using knockback or teleportation glyphs, be careful that walls do not form overtop of your blood pools. Recommended races are ![]() Human,
Human, ![]() Elf,
Elf, ![]() Gnome, or
Gnome, or ![]() Orc.
Orc.

